さくらVPSにRuby Enterprise Editionをインストールして、Railsのサンプルアプリを作成する
さくらVPS(CentOS)にRuby Enterprise Editionをインストールしたときのメモ。REE以外にも、MySQL、Apache、Railsをインストールして、サンプルサプリを作成する。
REEの公式ページによると、REEはPhusion Passenger(Railsを実行するためのApacheモジュール)を使ったときに、メモリ使用量が33%削減するらしい。通常のRuby1.8.7との互換も100%とのこと。
Ruby Enterprise Editionのインストールには、さくらVPSのCentOSにRuby Enterprise Editionをインストール id: kadoppeさんの記事を参考にさせていただいた。
1. Ruby Enterprise Editionのインストール
$ wget http://rubyenterpriseedition.googlecode.com/files/ruby-enterprise-1.8.7-2011.03.tar.gz # ファイルをダウンロード
$ tar zxvf ruby-enterprise-1.8.7-2011.03.tar.gz # ファイルを展開
$ cd ruby-enterprise-1.8.7-2011.03
$ sudo ./installer                              # インストーラーを実行
  Welcome to the Ruby Enterprise Edition installer
  This installer will help you install Ruby Enterprise Edition 1.8.7-2011.03.
  Don't worry, none of your system files will be touched if you don't want them
  to, so there is no risk that things will screw up.

  You can expect this from the installation process:

    1. Ruby Enterprise Edition will be compiled and optimized for speed for this
       system.
    2. Ruby on Rails will be installed for Ruby Enterprise Edition.
    3. You will learn how to tell Phusion Passenger to use Ruby Enterprise
       Edition instead of regular Ruby.

  Press Enter to continue, or Ctrl-C to abort.

  Checking for required software...

   * C compiler... found at /usr/bin/gcc
   * C++ compiler... found at /usr/bin/g++
   * The 'make' tool... found at /usr/bin/make
   * The 'patch' tool... found at /usr/bin/patch
   * Zlib development headers... not found
   * OpenSSL development headers... not found
   * GNU Readline development headers... not found

  Some required software is not installed.
  But don't worry, this installer will tell you how to install them.
  Press Enter to continue, or Ctrl-C to abort.
「必要なライブラリが入ってないよ!」と言われるので、インストールする。
$ sudo -i
# yum -y install readline-devel
# yum -y install zlib-devel
# yum -y install openssl-devel
再度インストーラーを実行。途中で、どのディレクトリにインストールするか聞いてくるので、/usr/localと入力する。
# ./installer # インストーラーを実行
  ...
  Where would you like to install Ruby Enterprise Edition to?
  (All Ruby Enterprise Edition files will be put inside that directory.)

  [/opt/ruby-enterprise-1.8.7-2011.03] : /usr/local # ここに入力する
  ...
  ...

  # mysqlのgemがインストールできなかったというエラー
  --------------------------------------------
  Warning: some libraries could not be installed
  The following gems could not be installed, probably because of an Internet
  connection error:

   * mysql

  These gems are not required, i.e. Ruby Enterprise Edition will work fine without them.
  But most people use Ruby Enterprise Edition in combination with Phusion Passenger and
  Ruby on Rails, which do require one or more of the aforementioned gems, so you may want to
  install them later.

  To install the aforementioned gems, please use the following commands:
    * /usr/local/bin/ruby /usr/local/bin/gem install mysql

  Press ENTER to show the next screen.
  ...

  # Phusion Passengerについての注意事項
  --------------------------------------------
  Ruby Enterprise Edition is successfully installed!
  If want to use Phusion Passenger (http://www.modrails.com) in combination
  with Ruby Enterprise Edition, then you must reinstall Phusion Passenger against
  Ruby Enterprise Edition, as follows:

    /usr/local/bin/passenger-install-apache2-module

  Make sure you don't forget to paste the Apache configuration directives that
  the installer gives you.


  # アンインストール方法
  If you ever want to uninstall Ruby Enterprise Edition, simply remove this
  directory:

    /usr/local

  If you have any questions, feel free to visit our website:

    http://www.rubyenterpriseedition.com

  Enjoy Ruby Enterprise Edition, a product of Phusion (www.phusion.nl) :-)
mysqlのgemがインストールできなかったと出る。
2. MySQLのインストール
mysqlのgemがインストールできなかったのは、MySQLそのものがインストールされていないことが原因かもしれない。まずMySQLをインストールしてからにしてみる。
# yum install mysql-server # MySQLをインストール
# /usr/local/bin/ruby /usr/local/bin/gem install mysql # mysqlのgemをインストール
  Building native extensions.  This could take a while...
  ERROR:  Error installing mysql:
          ERROR: Failed to build gem native extension.

          /usr/local/bin/ruby extconf.rb
  checking for mysql_ssl_set()... no
  checking for rb_str_set_len()... no
  checking for rb_thread_start_timer()... no
  checking for mysql.h... no
  checking for mysql/mysql.h... no
  *** extconf.rb failed ***
  Could not create Makefile due to some reason, probably lack of
  necessary libraries and/or headers.  Check the mkmf.log file for more
  details.  You may need configuration options.

  Provided configuration options:
          --with-opt-dir
          --without-opt-dir
          --with-opt-include
          --without-opt-include=${opt-dir}/include
          --with-opt-lib
          --without-opt-lib=${opt-dir}/lib
          --with-make-prog
          --without-make-prog
          --srcdir=.
          --curdir
          --ruby=/usr/local/bin/ruby
          --with-mysql-config
          --without-mysql-config


  Gem files will remain installed in /usr/local/lib/ruby/gems/1.8/gems/mysql-2.8.1 for inspection.
  Results logged to /usr/local/lib/ruby/gems/1.8/gems/mysql-2.8.1/ext/mysql_api/gem_make.out
mysqlのgemのインストールでエラーが出た。原因はよくわからないが、 mysql-serverだけでは足りないっぽい。以下のように、mysqlとmysql-develもインストールするとエラーが出なくなった。
# yum -y mysql mysql-devel
 ...
 Complete!

# /usr/local/bin/ruby /usr/local/bin/gem install mysql
  Building native extensions.  This could take a while...
  Successfully installed mysql-2.8.1                      # 今度は成功
  1 gem installed
  Installing ri documentation for mysql-2.8.1...
  Installing RDoc documentation for mysql-2.8.1...
今度はmysqlのgemを無事インストールできた。ついでに、MySQLを起動しておく。
# /etc/rc.d/init.d/mysqld start # サービスを起動
# /sbin/chkconfig mysqld on     # MySQLの自動起動をONにする
3. Apacheのインストール
Apacheをまだインストールしていなかったらインストールする。さくらVPS設定その2 Apache+MySQL+WordPress id:r7kamuraさんの記事が参考になる。
4. Railsのインストール
最新版のRailsをインストールする。
$ sudo gem install rails --no-rdoc # ドキュメント不要
  -bash: gem: command not found
おっと、gemにパスが通っていないため見つからない。これまでのように毎回フルパスを入力するのは面倒なので、以下のようにbashの設定ファイルにパスを書き込む。さくらVPS設定その1 User+SSH+Firewall id:r7kamuraさんの記事が参考になる。
$ vi ~/.bash_profile # ファイルを編集する
  PATH=$PATH:$HOME/bin                       # この行の後に...
  PATH=$PATH:/sbin:/usr/sbin:/usr/local/sbin # この行を追加

# 「:wq」で保存後、以下のコマンドで設定を再読み込みする。
$ source ~/.bash_profile
あらためてrailsをインストール。
$ sudo gem install rails --no-rdoc # ドキュメント不要
iptables(ファイヤーウォール)でRailsのポートを開けていない場合は、以下のコマンドで設定しておく。
$ sudo vi /etc/sysconfig/iptables
  -A RH-Firewall-1-INPUT -m state --state NEW -m tcp -p tcp --dport 3000  -j ACCEPT # 追加
$ sudo /etc/rc.d/init.d/iptables restart # 再起動
$ sudo sudo iptables -L                  # 設定の確認
5. サンプルアプリケーションの作成
サンプルアプリケーションを作って実行してみる。
$ mkdir ~/workspace # ホームディレクトリにworkspaceフォルダを作る
$ cd ~/workspace
$ rails new demo -d mysql # DBを指定してアプリケーションを新規作成
  ...
  run  bundle install
  Enter your password to install the bundled RubyGems to your system:
「足りないgemをインストールするからパスワード入れてよ」と言われるので、ログインユーザーのパスワードを入力する。すると、以下のようにたくさんインストールしてくれた。
  ..
  Installing coffee-script-source (1.1.3)
  Installing execjs (1.2.9)
  Installing coffee-script (2.2.0)
  ...
  Installing coffee-rails (3.1.1)
  Installing jquery-rails (1.0.17)
  Installing mysql2 (0.3.10) with native extensions
  ...
  Installing sass (3.1.10)
  Installing sass-rails (3.1.4)
  Installing uglifier (1.0.4)
  Your bundle is complete! Use `bundle show [gemname]` to see where a bundled gem is installed.
とりあえず、デモアプリに必要な準備をする。
$ rails generate scaffold Post name:string title:string content:text # Postという名前のモデル、ビュー、コントローラーを作成
$ rake db:create   # DBを作成
$ rake db:migrate  # テーブルを作成
$ rake routes      # URLのルーティングを確認(/postsにアクセスすればよいことがわかる)
      posts GET    /posts(.:format)          {:action=>"index", :controller=>"posts"}
            POST   /posts(.:format)          {:action=>"create", :controller=>"posts"}
   new_post GET    /posts/new(.:format)      {:action=>"new", :controller=>"posts"}
  edit_post GET    /posts/:id/edit(.:format) {:action=>"edit", :controller=>"posts"}
       post GET    /posts/:id(.:format)      {:action=>"show", :controller=>"posts"}
            PUT    /posts/:id(.:format)      {:action=>"update", :controller=>"posts"}
            DELETE /posts/:id(.:format)      {:action=>"destroy", :controller=>"posts"}
作成したアプリケーションのルートディレクトリでサーバーを起動する。
$ rails server
  /usr/local/lib/ruby/gems/1.8/gems/execjs-1.2.9/lib/execjs/runtimes.rb:47:in `autodetect': Could not find a JavaScript runtime. See https://github.com/sstephenson/execjs for a list of available runtimes. (ExecJS::RuntimeUnavailable)
        from /usr/local/lib/ruby/gems/1.8/gems/execjs-1.2.9/lib/execjs.rb:5
        from /usr/local/lib/ruby/gems/1.8/gems/coffee-script-2.2.0/lib/coffee_script.rb:1:in `require'
        from /usr/local/lib/ruby/gems/1.8/gems/coffee-script-2.2.0/lib/coffee_script.rb:1
        from /usr/local/lib/ruby/gems/1.8/gems/coffee-script-2.2.0/lib/coffee-script.rb:1:in `require'
        from /usr/local/lib/ruby/gems/1.8/gems/coffee-script-2.2.0/lib/coffee-script.rb:1
        from /usr/local/lib/ruby/gems/1.8/gems/coffee-rails-3.1.1/lib/coffee-rails.rb:1:in `require'
        from /usr/local/lib/ruby/gems/1.8/gems/coffee-rails-3.1.1/lib/coffee-rails.rb:1
        from /usr/local/lib/ruby/gems/1.8/gems/bundler-1.0.21/lib/bundler/runtime.rb:68:in `require'
        from /usr/local/lib/ruby/gems/1.8/gems/bundler-1.0.21/lib/bundler/runtime.rb:68:in `require'
        from /usr/local/lib/ruby/gems/1.8/gems/bundler-1.0.21/lib/bundler/runtime.rb:66:in `each'
        from /usr/local/lib/ruby/gems/1.8/gems/bundler-1.0.21/lib/bundler/runtime.rb:66:in `require'
        from /usr/local/lib/ruby/gems/1.8/gems/bundler-1.0.21/lib/bundler/runtime.rb:55:in `each'
        from /usr/local/lib/ruby/gems/1.8/gems/bundler-1.0.21/lib/bundler/runtime.rb:55:in `require'
        from /usr/local/lib/ruby/gems/1.8/gems/bundler-1.0.21/lib/bundler.rb:122:in `require'
        from /home/montecut/workspace/demo/config/application.rb:7
        from /usr/local/lib/ruby/gems/1.8/gems/railties-3.1.1/lib/rails/commands.rb:52:in `require'
        from /usr/local/lib/ruby/gems/1.8/gems/railties-3.1.1/lib/rails/commands.rb:52
        from /usr/local/lib/ruby/gems/1.8/gems/railties-3.1.1/lib/rails/commands.rb:49:in `tap'
        from /usr/local/lib/ruby/gems/1.8/gems/railties-3.1.1/lib/rails/commands.rb:49
        from script/rails:6:in `require'
        from script/rails:6
エラーが出た。Rails 3.1 execjs and Could not find a JavaScript runtimeのページによると、JavaScriptライブラリをインストールすると解決するとのこと。Gemfileにgemを追記して、bundle installコマンドで足りないgemをインストールする。
$ vi Gemfile # アプリケーションのルート直下にあるGemfileを編集
  gem 'execjs'         # 追加
  gem 'therubyracer'   # 追加
$ bundle install       # 足りないgemを入れてくれる
$ rails server         # 再度サーバーを起動
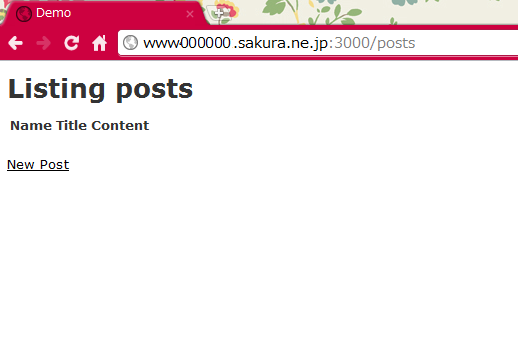
サーバーが起動したようなので、ブラウザから確認。http://wwwXXXXXX.sakura.ne.jp:3000/postsを開いて、demoアプリケーションの画面が表示されたのでこれでOK。
